How to Repair Outdoor Gear at the Sewing Level
Assess whether a pack, jacket, or technical-fabric repair is yours to make, choose needle, thread, stitch, or patch as a tested system for coated and laminated materials, and route warranty, membrane, and safety-critical work to the right service.
Current membrane-brand repair guidance, a long-established professional outdoor-gear repair service, first-party thread-manufacturer selection guidance, and a repair-product manufacturer's product range reviewed for repair routing, thread-selection variables, and adhesive and patch product families; no universal needle, thread, stitch, patch, adhesive, setting, warranty result, or restored waterproof, load, or safety performance is prescribed.
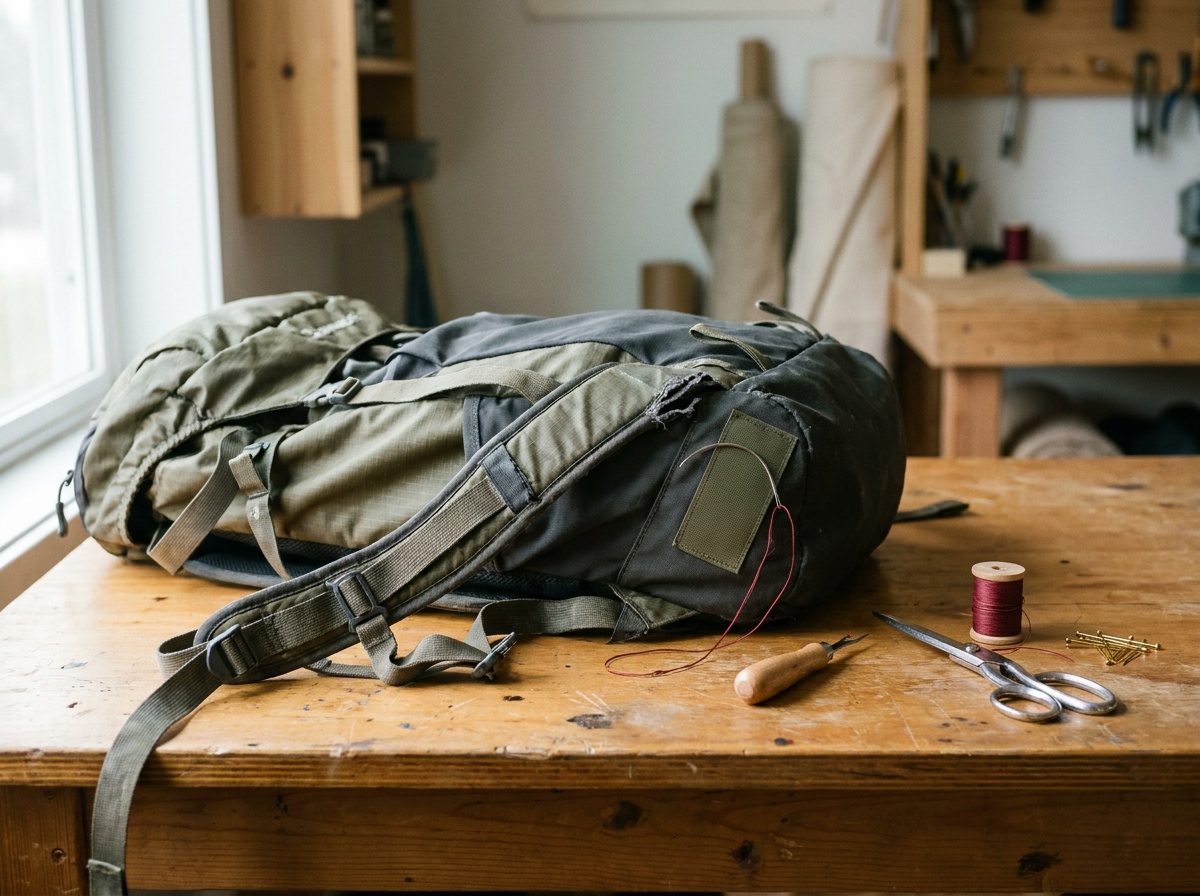
Treat an outdoor-gear repair as three decisions in order. First, decide whether the repair is yours to make: warranty status, membrane and laminate construction, and any safety or load-bearing function can each route the job to the manufacturer or a professional service before a needle comes out. Second, identify the material system: coated, laminated, DWR-treated, mesh, webbing, or foam-backed panels each fail and accept repairs differently, and every needle hole in a coated or laminated fabric is permanent. Third, build the repair as a tested system: needle, thread, stitch, patch, and any adhesive or seam sealer chosen together and piloted on scrap or a hidden area before touching the damage. Release the item back to use only after the repair has been load-tested and, where relevant, leak-tested against the job you defined.
Packs, shell jackets, tents, and technical apparel are sewn products, and a sewing bench can bring many of them back to service. The same bench can also void a warranty, put a permanent hole field through a waterproof laminate, or return a load-bearing strap to duty on the strength of hope. This guide is the sewing-side companion to How to Choose a Clothing Repair Service: it covers the repairs you might do yourself and the evidence that tells you to stop.
Decide whether the repair is yours to make
Work through the routing questions before planning any stitch:
- Is the item under warranty or a brand repair program? Many outdoor brands repair their own products or direct owners to authorized services. The GORE-TEX brand publishes current repair information for garments built on its laminates as part of its care-and-repair support; a brand's own route protects both the laminate and any guarantee. Check the actual brand's current policy before cutting or gluing anything.
- Does the damage touch a membrane, laminate, taped seam, or coated panel? These constructions can be damaged further by improvised sewing, because stitching perforates the waterproof layer. Adhesive repair, heat-applied patching by instruction, or professional service are the candidate routes.
- Is the function safety-relevant or load-bearing? Climbing harnesses, load-rated slings, PFDs, child carriers, and similar items are outside home-repair scope entirely; their failure consequence belongs with the manufacturer or a qualified service. For packs, the load path through straps, haul loops, and hip belts deserves the same respect even when the fabric around them is fair game.
- Is the item worth more repaired professionally? Specialist shops exist for exactly this work. Rainy Pass Repair has repaired packs, tents, and rain jackets for over 40 years and is used by major outdoor brands for warranty and after-sale repairs; a shop like that can replace zippers, panels, and laminated sections that a home bench cannot.
For finding and vetting a service near you, the directory's Repair and conserve task view lists source-checked repair directories and conservation resources.
| Field fix | Tape, patch, or coarse stitching that keeps the trip going. Plan to redo it properly at home; record what was applied, because residue affects later adhesive repairs. |
| Home sewn repair | Seams, patches on uncoated or forgiving fabric, webbing re-attachment on non-safety items, hardware swaps, and zipper sliders, all within your tested capability. |
| Adhesive or heat-applied patch | Coated, laminated, and DWR fabrics where stitching would perforate the barrier. Follow the patch or adhesive manufacturer's instructions for the exact fabric. |
| Manufacturer or warranty route | Items under warranty, brand repair programs, and laminate work the brand or its authorized service should handle. |
| Professional repair shop | Zipper replacement, panel replacement, taped-seam work, and anything above your pilot evidence. Get scope and price in writing first. |
| Retire or repurpose | Safety-relevant damage, degraded coatings shedding film, or repair cost beyond item value. Harvest hardware and usable fabric. |
Identify the material system before choosing a method
Outdoor gear mixes materials that respond differently to a needle:
- Woven pack fabrics (commonly nylon or polyester, often with a polyurethane coating on the back face) sew well, but the coating side marks the waterproof boundary: needle holes pass through it and stay.
- Laminated shell fabrics bond a face fabric to a membrane, sometimes with a backer. Stitching perforates the membrane, so sewn repairs on these panels also need seam sealing or an adhesive route, and taped factory seams should be left to services equipped to re-tape them.
- DWR-treated faces shed water at the surface. A repair can survive while the surrounding water repellency fails; renewing DWR is a care task, not a sewing task, and it follows the treatment product's instructions.
- Mesh, stretch panels, and foam-backed areas distort under heavy thread tension and may need a patch backed on both sides.
- Webbing, binding, and cord carry loads and abrade; damage here is a strength question first and a cosmetic question second.
Identify what you actually have before selecting anything: brand and model, stated fabric and membrane names, coating condition (a sticky or flaking inner face signals coating breakdown that no patch reverses), and how the damaged area is loaded in use. Kit Authority's guide to how rain-jacket construction and DWR actually work is a useful primer on 2-layer versus 3-layer laminates and waterproof ratings when you are decoding a jacket's construction.
Clean the item before repairing it. Adhesives and patches specify clean, dry surfaces, and ground-in grit abrades thread from inside a seam. Ruck Authority's guide to washing and maintaining a rucksack covers cleaning packs without damaging coatings, which is the right first step before any pack repair.
Choose needle and thread as a tested pair
Needle and thread selection for coated and heavy fabrics follows the same logic as any machine work on this site: verify the machine's needle system, choose candidates for the full material stack, and pilot before committing. How to Select and Validate a Sewing-Machine Needle covers that process; the outdoor-gear specifics to add are these:
- Every hole is permanent in coated and laminated fabric. Pilot on scrap, a seam allowance, or an invisible area, because an unpicked seam leaves a perforation line. Choose the finest needle that passes the stack without thread damage rather than defaulting to the heaviest available.
- Thread is an engineering choice, not a color choice. Thread manufacturer American & Efird's thread selection guidance names sewability, seam performance, appearance, availability, and price as the key selection characteristics and publishes selection matrices by end use. Use a first-party matrix as the starting point, then confirm with your own pilot on the actual materials.
- Match thread behavior to exposure. Outdoor items live with UV, moisture, and abrasion; fiber and finish choices affect how a seam ages. Record what you used so a failed repair teaches you something.
- Layer stacks change fast. A pack seam can jump from two layers to eight at a junction. Test the worst stack in the repair, not the easiest, and hand-walk a machine over thick junctions rather than forcing speed.
Record the released combination: needle system, type, and size; thread product and size; stitch length; and the scrap evidence that passed.
Hand stitches that hold under load
Much outdoor repair happens where a machine cannot reach: inside a pack, around a buckle, along a curved hem. Hand candidates worth piloting:
- Backstitch for seams that must resist steady pulling; each stitch overlaps the last, so the seam has no single running thread to slip.
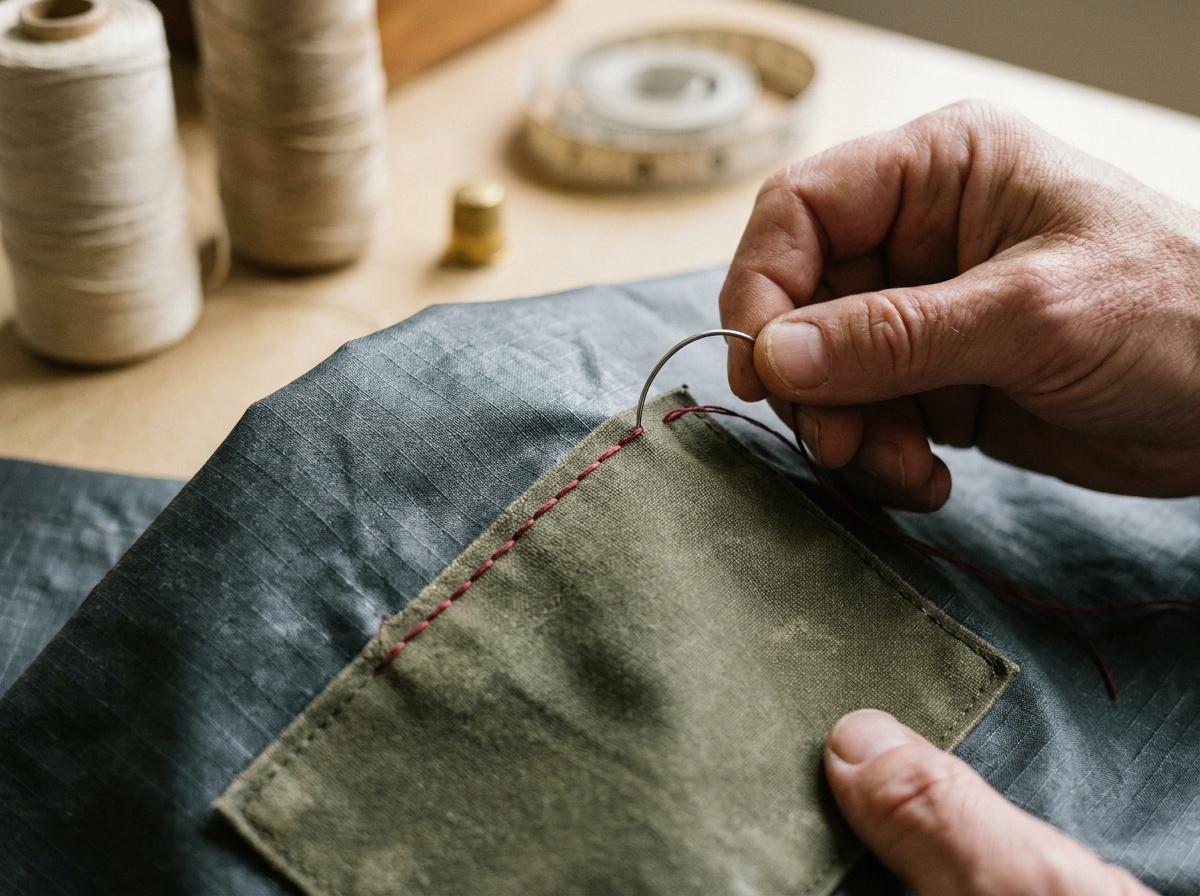
- Doubled saddle-style stitching (two needles alternating through the same holes, as used with a stitching awl on webbing and heavy fabric) leaves two independent thread paths through each hole, so abrasion of one face does not release the seam.
- Hand bar tacks: several long anchor stitches across the stress point, wrapped or overcast into a solid block, for the ends of webbing, pocket corners, and anywhere a seam ends in open fabric.
- Whip or overcast stitching to close a torn edge before a patch goes over it, keeping the tear from spreading under the patch.
Whatever the stitch, the load test is the release gate: pull the repair by hand harder than use will, watch what moves, and re-stitch or re-route the repair if the fabric around the stitching tears rather than the seam holding. A repair that transfers load into weakened fabric fails at the patch edge; extending the patch or stitching into sound fabric changes where that edge sits.
Patch laminated and DWR fabrics by the product's instructions
Where stitching would perforate a barrier, adhesive systems do the work. GEAR AID manufactures the product families most home repairers reach for: Tenacious Tape repair tapes and patches, Aquaseal repair adhesives, Seam Grip seam sealants, and Revivex water-repellency treatments. The load-bearing point is that each product publishes its own surface preparation, application, and cure instructions for specific fabric types, and the repair's performance depends on following the instructions for the exact product and fabric, not on the product name.
Working rules that survive across adhesive repairs:
- Clean and dry the area per the product's instructions; field tape and grime must come off first, usually with the remover or prep the manufacturer names.
- Round patch corners and size the patch past the damage into sound fabric, on the face the product specifies; some repairs call for patching both faces.
- Respect cure times before flexing, packing, or wetting the repair.
- Seal sewn repairs on waterproof panels with the appropriate seam sealer if the item's water protection matters, then leak-test rather than assume: hold water in or over the repaired area and inspect the far side.
- Record product, batch or purchase date, fabric, and result; adhesives age in the tube, and a failed bond with a fresh product on a clean surface tells you the route was wrong, not just the execution.
DWR renewal is separate from patching: a repaired panel that wets out may need the whole garment's water repellency renewed with a treatment product, applied per its instructions, and that decision belongs to the item's care routine rather than the repair.
Define done, test it, and record it
A repair is finished when it passes the test you defined at the start, not when the thread is cut:
- Function: the seam holds the defined load, the zipper runs, the patch stays bonded through a flex-and-pack test, the repaired panel passes its leak check.
- Appearance: as agreed with yourself or the item's owner; visible mending on gear is a legitimate choice, but it should be a choice.
- No new damage: surrounding fabric, coatings, and hardware came through the repair unharmed.
- Documented: what failed, what was done, with which materials, and what to watch. The record turns the next failure on the same item from a mystery into data.
Re-inspect repairs after the first real outing and then periodically. Load-path repairs and adhesive patches earn a squeeze and a tug at the trailhead until they have history.
Outdoor-gear repair record
Outdoor-gear repair record
Use this record to route the repair correctly, identify the material system, pilot the needle-thread-stitch or adhesive system, test the finished repair against its defined job, and keep the evidence with the item.
Nothing entered here is saved or sent.
Item and routing decision
Decide whose repair this is before planning it.
Material system
Identify what the needle or adhesive will actually meet.
Repair system and pilot
Choose needle, thread, stitch, patch, and sealer together, then prove them on scrap.
Execution and test
The defined test is the release gate.
Release and follow-up
Keep the evidence with the item.
Sources and decision boundaries
The GORE-TEX brand's repair information is first-party guidance for products built on its laminates and does not speak for other membranes or brands. Rainy Pass Repair is cited as evidence that professional outdoor-gear repair services exist and handle brand warranty work, not as an endorsement of any particular outcome or price. American & Efird's thread selection guidance is a thread manufacturer's own selection framework and matrices. GEAR AID is cited as the manufacturer of common repair-product families whose individual instructions control their use. None of these sources, and not this guide, prescribes a needle, thread, stitch, patch, adhesive, or setting for a specific item, and no home repair described here restores a certified waterproof, load, or safety rating. Warranty terms, brand repair policies, and product instructions are controlled by their publishers and change; check the current version before relying on any of them.
Can I sew a patch on a waterproof jacket?
Stitching perforates the waterproof layer, and every hole is permanent. For membrane and laminate panels, the candidate routes are the brand's repair service, a professional shop, or an adhesive patch applied by its manufacturer's instructions for that fabric. If you do sew, plan to seal the stitching and leak-test the result.
What needle and thread should I use for pack fabric?
There is no universal pair. Verify your machine's needle system, pick candidates for the actual layer stack, consult a thread manufacturer's selection guidance, and pilot on scrap before sewing the repair. The finest needle that passes the stack cleanly beats the heaviest needle in the drawer, because holes in coated fabric do not close.
Which hand stitch is strongest for gear repairs?
Strength lives in the system, not the stitch name. Backstitch, doubled saddle-style stitching, and hand bar tacks are the candidates worth piloting for loaded seams, webbing, and stress points. Test the finished repair by pulling harder than use will, and watch whether the seam or the surrounding fabric gives first.
When should I stop and send gear to a professional?
When the item is under warranty, when damage touches taped seams, membranes, or laminates you are not equipped to re-seal, when the part is load-bearing or safety-relevant, and when your pilot on scrap fails. Specialist shops rebuild zippers, panels, and laminated sections routinely; the repair directory's Repair and conserve view is the place to start looking.