Seam Finishes: A Complete Guide
Seven ways to finish a raw seam edge, what each one is for, and how to pick the right one by fabric weight, tools on hand, and whether the seam will show.
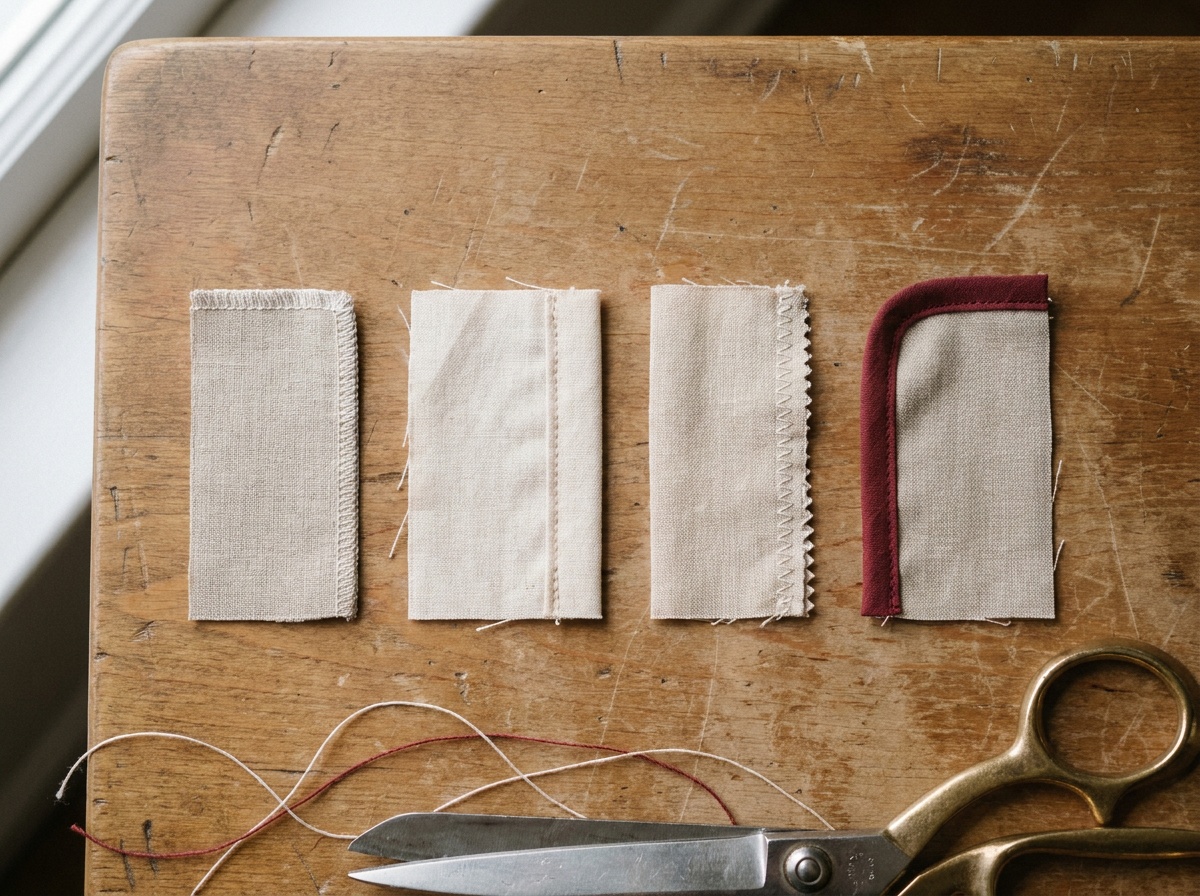
A seam finish is a treatment applied to the raw edge of a seam allowance so it stops fraying and looks neat on the inside of the garment. Which one to use comes down to three things: fabric weight, what tools you have (serger or straight machine only), and whether the seam allowance will be seen or hidden inside a lining. Lightweight fabrics suit enclosed finishes like a French seam or a plain pinked edge. Medium weights suit zigzag or overlock. Heavy or structural seams suit flat-felled or bound finishes.
Every seam has a raw edge, and every raw edge wants to fray. A seam finish is the step that stops it, or slows it down enough that it never becomes a problem. The finish you pick also decides what the inside of the garment looks like, which matters as soon as the garment is unlined or reversible.
How do you choose the right seam finish?
Three questions get you to an answer faster than scanning a list of techniques:
How does the fabric behave? A tightly woven quilting cotton barely frays. A loosely woven linen or a slippery rayon frays fast and needs a finish that fully encloses the edge, not one that only slows it down.
What tools do you have? A serger trims and finishes in one pass and is the fastest option if you own one. Without a serger, a zigzag or pinked edge on a straight machine is the practical choice.
Will the seam allowance be seen? In a lined jacket, the allowance is hidden and almost any finish works. In an unlined jacket, a reversible piece, or a blouse where the inside might show, the finish becomes part of the garment's appearance, which is where French seams, bound seams, and Hong Kong finishes earn their keep.
| Pinked seam | Beginner · tightly woven, stable fabrics |
| Zigzag / faux overlock | Beginner · light-medium wovens and knits |
| Overlocked (serged) | Beginner-intermediate · nearly any fabric, needs a serger |
| French seam | Intermediate · sheer and lightweight fabrics |
| Flat-felled seam | Intermediate-advanced · denim, canvas, heavy wovens |
| Bound seam | Advanced · unlined jackets and coats |
| Hong Kong finish | Advanced · unlined tailoring, decorative binding |
The seven seam finishes, explained
Pinked seam
Trim the raw edge with pinking shears instead of straight scissors. The zigzag notches shorten the straight-grain threads at the edge, which slows fraying without stopping it completely.
Works on tightly woven, stable fabrics that don't fray much: quilting cotton, stable linen, felt. Skip it on loosely woven or heavily fraying fabric, it won't hold up to repeated washing or handling. No machine needed, just the shears. It's the fastest of the seven finishes and a reasonable choice for low-wear pieces or anything that will be lined anyway.
Zigzag finish (faux overlock)
Sew a zigzag stitch along or near the raw edge to bind the threads down. A wider multi-stitch zigzag (sometimes called a 3-step zigzag) spreads the stitching further and mimics overlock coverage on a straight machine.
Good for light-to-medium wovens and knits when a serger isn't available. Settings vary a lot by machine and fabric, so treat any number as a starting point: something around 2 to 3.5mm stitch length and 2.5 to 5mm width works for most wovens, and a narrower setting (roughly 0.5 to 1.5mm width, 1.5mm length) suits lightweight knits better and avoids tunneling. Test on a scrap of the actual fabric before committing to the seam.
Overlocked (serged) finish
A serger trims the raw edge and wraps thread loops around it in a single pass, combining trimming and finishing (and sometimes seaming) in one step. It's the default finish in ready-to-wear because it's fast and consistent.
Home sewing patterns are commonly drafted with a 5/8 in (1.5 cm) seam allowance, which is wider than a serger needs. Most sergers only need 3/8 to 1/2 in of allowance to trim and finish: 3/8 in is common for a 3- or 4-thread overlock, 1/2 in for a 5-thread safety stitch. Anything beyond that gets trimmed away. The main barrier here is owning a serger and learning to thread it, not the technique itself.
French seam
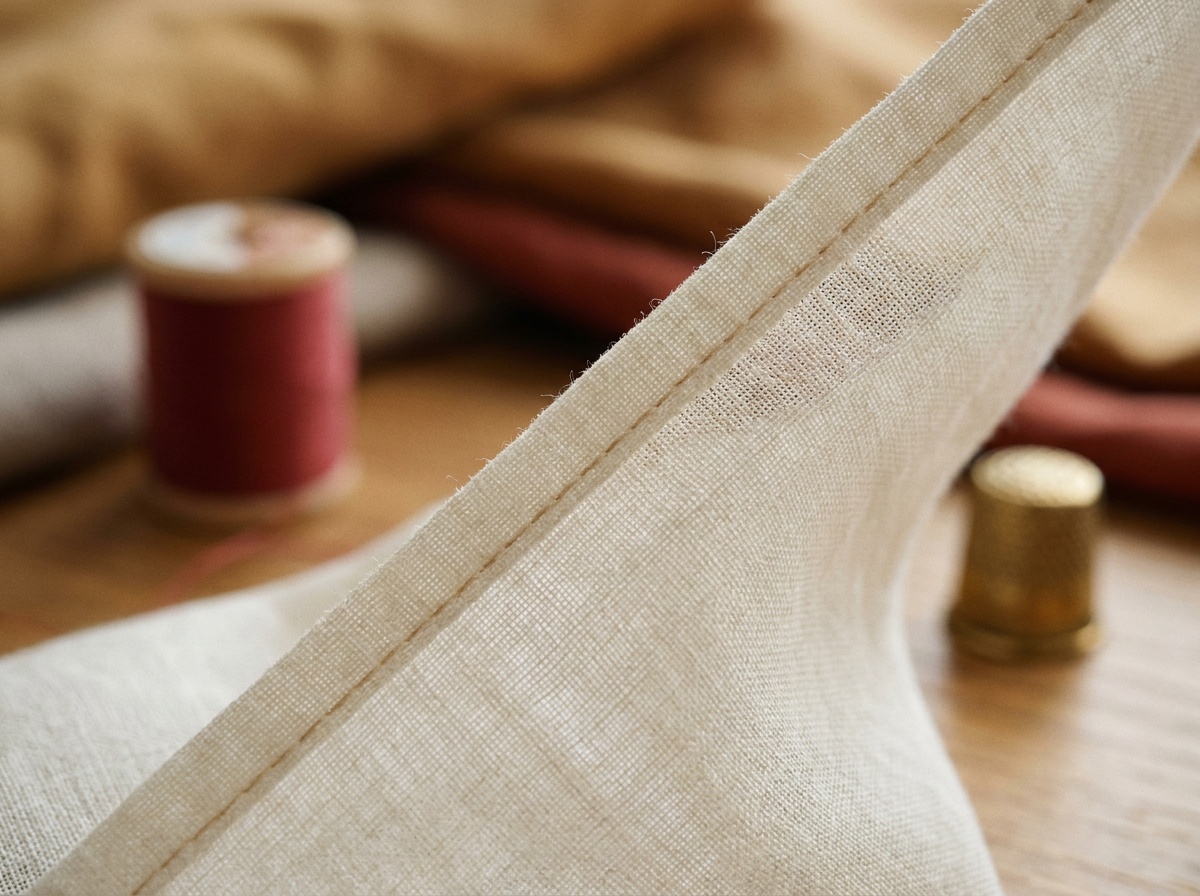
A fully enclosed seam sewn in two passes. First, sew wrong sides together at a narrow allowance (commonly 1/4 in / 0.6 cm), then trim that allowance down to about 1/8 in (0.3 cm). Second, fold right sides together, which encases the trimmed edge, and stitch again at roughly 1/4 in (0.6 cm) so no raw edge is ever exposed.
This needs a starting seam allowance wide enough to survive both passes, a minimum cut allowance of around 5/8 in (1.5 cm) is typical. Best on lightweight, sheer, or fine fabrics (voile, chiffon, silk, lawn) and on garments where the inside is visible or unlined, like blouses and lingerie. Not practical on thick or heavily curved seams, the bulk builds up fast. No special equipment required, just precision and pressing.
Flat-felled seam
One raw edge is trimmed narrower, the wider allowance folds over it enclosing both raw edges, and that fold is topstitched flat against the garment. Two visible rows of topstitching on the right side are the tell, this is what you see on the outside of a jeans inseam.
A common construction: sew wrong sides together at around 1/2 in (1.3 cm), trim one allowance down to about 1/8 in (0.3 cm), fold the wider side over it, and edgestitch it down. A "faux" flat-fell, topstitched from the right side without the traditional double pass, is a common shortcut in home sewing. Best on heavyweight, hardwearing fabrics: denim, canvas, twill, chambray, wool coating. Classic uses are the jeans inseam, yoke, and crotch seam, and traditional men's shirting. True flat-felled construction, with both raw edges enclosed and no visible fold on the wrong side, is traditionally done on a specialized double-needle felling machine in factories. Home sewists approximate it by hand or with careful topstitching.
Bound seam
Each raw edge of the seam allowance (pressed open, treated separately) is wrapped in a folded strip of binding, purchased or self-made bias tape, and stitched through all layers.
Best for unlined jackets, coats, and skirts where the seam allowance shows when the garment moves or is worn open, and also works as a deliberate design detail when the binding is a contrast color. It's fiddly to keep the binding width consistent, which puts it at the advanced end of the scale.
Hong Kong finish
A specific bound-seam technique using bias-cut strips. Sew the bias strip right side to the seam allowance edge at a narrow seam (commonly 1/4 in / 6mm), press the binding open and wrap it around to the back of the allowance, then stitch in the ditch from the right side, along the existing seam line, so the securing stitch disappears rather than showing as topstitching on the binding. Trim the excess at the back.
Best for heavier or bulkier fabrics in unlined tailored garments (wool jackets, coats, trousers) where a folded finish would add too much bulk. It also adds a pop of contrast color inside the garment without the weight of a fully folded finish. This is the most time-consuming of the seven and sits at the couture end of the scale.
These two get treated as synonyms in a lot of sewing references, but they're not the same thing. Bound seam is the general category: any raw edge wrapped in binding and stitched, with the securing stitch sometimes visible as topstitching on the binding itself. Hong Kong finish is a specific, more refined version of it: the seam allowances are pressed open and bound separately, and the securing stitch is hidden by stitching in the ditch of the existing seam line instead of topstitching over the binding. Every Hong Kong finish is a bound seam. Not every bound seam is a Hong Kong finish.
How seam finishes fit into the bigger picture
Seam finishes sit inside a larger, formal classification system used across the apparel industry. ASTM D6193, "Standard Practice for Stitches and Seams," codes seam classes with letter pairs (for example SSa for a basic superimposed seam, where plies are stacked and stitched a set distance from the edge, or LSa for a lapped seam) and gives bound and flat seams their own class codes. You don't need the standard to sew well, but it helps if you ever need to describe a seam precisely to a factory or another sewist.
Do I need a serger to finish seams well?
No. A serger is the fastest route, but pinking, zigzag, French seams, flat-felled seams, and bound seams are all done on a straight machine or by hand. Choose based on the fabric and whether the seam allowance will be visible, not on whether you own a serger.
Which finish stops fraying completely?
French seams, flat-felled seams, bound seams, and Hong Kong finishes all fully enclose the raw edge, so nothing is left exposed to fray. Pinking, zigzag, and overlock reduce fraying but don't enclose the edge, they leave stitched or trimmed thread exposed at the surface.
Can I use a French seam on a heavy fabric?
You can, but the two folded layers add bulk fast on anything thick or heavily curved. French seams work best on lightweight and sheer fabrics for that reason.
Why do patterns use a 5/8 inch seam allowance if a serger only needs 3/8?
The 5/8 inch allowance is a home sewing default that predates widespread serger ownership, and it also gives room for fitting adjustments before trimming. If you're serging, you can trim the excess away once the fit is confirmed.